Japanese Katsu Bowls: A Delicious Guide to Making Authentic Katsu at Home
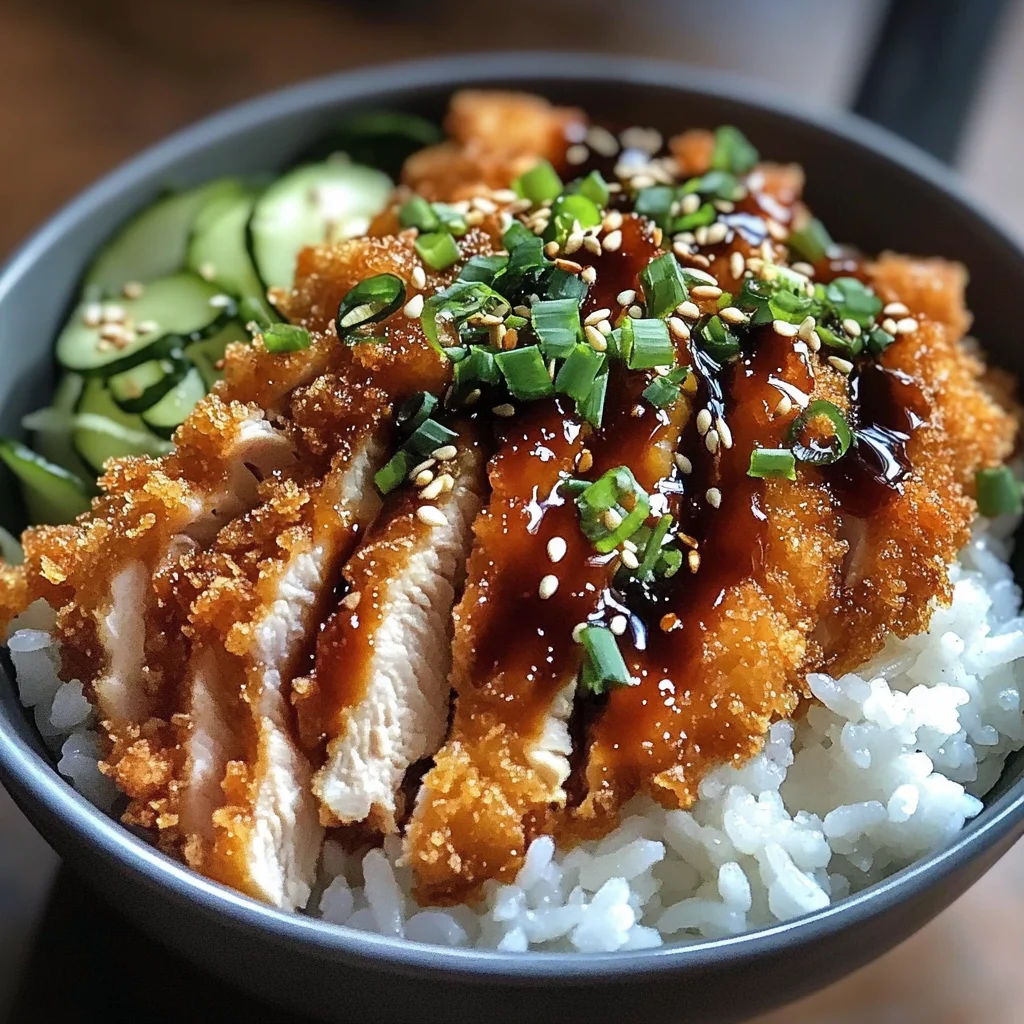
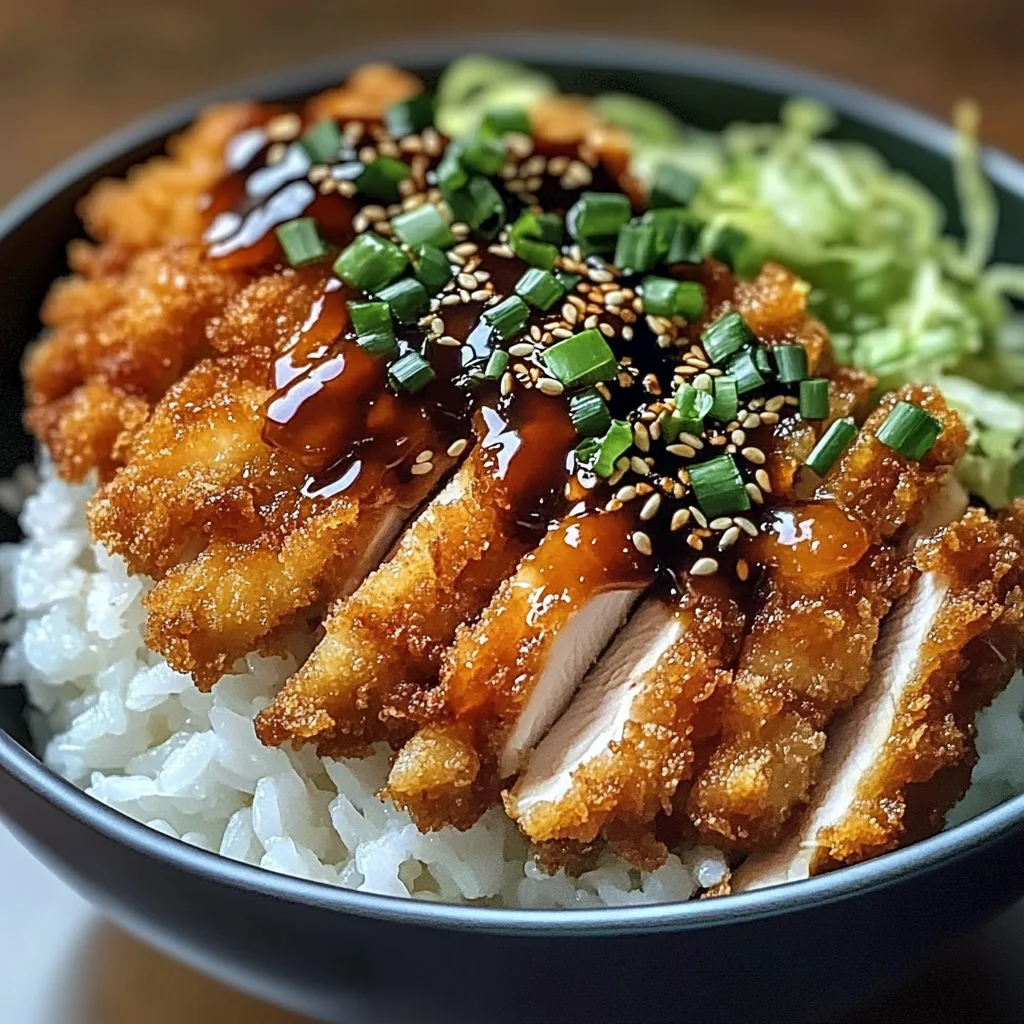
Enjoy a delicious homemade Chicken Katsu served with perfectly seasoned rice and a tangy sauce. This crispy, golden-brown dish is a Japanese favorite that’s sure to impress! Japanese Katsu Bowls: A Delicious Guide to Making Authentic Katsu at Home is perfect for family dinners, special occasions, or simply when you crave something comforting yet exciting. The blend of textures and flavors makes this dish stand out, allowing you to enjoy an authentic taste of Japan right in your kitchen.
Why You’ll Love This Recipe
- Easy to Make: With straightforward steps, even beginners can successfully create this delicious meal.
- Flavor Packed: The combination of crispy chicken and savory sauce brings incredible flavor to your plate.
- Customizable: Feel free to swap chicken for beef or turkey according to your preference.
- Perfect for Meal Prep: Make extra portions for quick lunches or dinners throughout the week.
- Family Favorite: It’s a dish that appeals to both kids and adults alike!
Tools and Preparation
To make this delicious Japanese Katsu Bowl, you’ll need some essential tools. These will help ensure your cooking process is smooth and efficient.
Essential Tools and Equipment
- Skillet
- Saucepan
- Mixing bowls
- Meat mallet or rolling pin
- Cooking thermometer
- Slotted spoon
Importance of Each Tool
- Skillet: Ideal for frying the chicken evenly while achieving that crispy texture.
- Saucepan: Perfect for cooking rice to fluffy perfection without burning.
- Mixing bowls: Necessary for preparing breading and sauces without making a mess.
Ingredients
Enjoy a delicious homemade Chicken Katsu served with perfectly seasoned rice and a tangy sauce. This crispy, golden-brown dish is a Japanese favorite that’s sure to impress!
For the Chicken Katsu
- 2 boneless chicken breasts (or beef loin, if preferred)
- Salt and pepper, to taste
- 1 cup all-purpose flour
- 2 large eggs
- 1 cup panko breadcrumbs
- Vegetable oil, for frying
For the Rice
- 2 cups Japanese short-grain rice
- 2 ½ cups water
- 1 tablespoon rice vinegar
- 1 tablespoon sugar
- ½ teaspoon salt
For the Sauce
- ¼ cup tonkatsu sauce (or store-bought if you prefer)
- 1 tablespoon soy sauce
- 1 teaspoon Worcestershire sauce
- 1 teaspoon ketchup
For Garnish
- 1 cup shredded cabbage
- 2 green onions, sliced
- Sesame seeds, for garnish
- Pickled ginger (optional)
How to Make Japanese Katsu Bowls: A Delicious Guide to Making Authentic Katsu at Home
Step 1: Rinse the Rice
Rinse the rice under cold water until the water runs clear. This helps remove excess starch that can make the rice gummy.
Step 2: Soak the Rice
Transfer the rinsed rice to a saucepan, add water, and soak for 30 minutes. Soaking allows the grains to absorb water evenly.
Step 3: Cook the Rice
Cover and bring to a boil on medium heat. Once boiling, reduce heat and simmer for 15 minutes without lifting the lid. After cooking, turn off heat and let it sit covered for another 10 minutes.
Step 4: Season the Rice
Mix rice vinegar, sugar, and salt in a bowl until dissolved. Gently fold this mixture into the cooked rice.
Step 5: Prepare Chicken
Pound chicken breasts to an even thickness of about ½ inch. Season both sides with salt and pepper.
Step 6: Set Up Breading Station
Set up three bowls—one with flour, one with beaten eggs, and one with panko breadcrumbs.
Step 7: Bread Chicken
Dredge each chicken breast in flour first. Then dip it in beaten eggs before coating it thoroughly with panko breadcrumbs.
Step 8: Fry Chicken
Heat vegetable oil in a skillet over medium heat. Fry each piece of chicken for about 4–5 minutes on each side until golden brown and cooked through.
Step 9: Drain Chicken
Once cooked, drain on paper towels before slicing into strips.
Step 10: Make Sauce
In a bowl, combine tonkatsu sauce, soy sauce, Worcestershire sauce, and ketchup. Mix well until combined.
Step 11: Assemble Your Bowl
On a plate, serve a portion of seasoned rice topped with sliced katsu. Add shredded cabbage and green onions on top. Drizzle with prepared sauce and sprinkle sesame seeds as garnish.
Now you’re ready to enjoy your homemade Japanese Katsu Bowls!
How to Serve Japanese Katsu Bowls: A Delicious Guide to Making Authentic Katsu at Home
Serving Japanese Katsu bowls is all about presentation and balance. A well-served katsu bowl enhances the dining experience, making it visually appealing and satisfying. Here are some great serving suggestions to elevate your meal.
Add Fresh Vegetables
- Shredded Cabbage: Pile on a generous amount of shredded cabbage for crunch and freshness.
- Sliced Green Onions: Sprinkle sliced green onions on top for a pop of color and a mild onion flavor.
Drizzle with Sauce
- Tonkatsu Sauce: Drizzle tonkatsu sauce over the katsu for added richness and flavor.
- Sesame Oil: A light drizzle of sesame oil can enhance the nuttiness of the dish.
Include Pickled Ginger
- Pickled Ginger: Serve pickled ginger on the side for a tangy contrast to the crispy katsu.
Pair with Rice
- Seasoned Rice: Serve your katsu over fluffy seasoned rice that complements the flavors of the dish.
How to Perfect Japanese Katsu Bowls: A Delicious Guide to Making Authentic Katsu at Home
Perfecting Japanese Katsu bowls requires attention to detail and technique. Follow these tips to make sure your dish stands out.
- Bold Seasoning: Season your chicken well before breading. This adds depth of flavor.
- Proper Breading Technique: Ensure even coating by dredging in flour first, then eggs, and finally panko breadcrumbs.
- Optimal Frying Temperature: Maintain the oil temperature around 350°F to ensure a crispy exterior without greasy results.
- Rest Before Slicing: Let the fried katsu rest before slicing. This helps keep it juicy and prevents excess moisture from making it soggy.
Best Side Dishes for Japanese Katsu Bowls: A Delicious Guide to Making Authentic Katsu at Home
Complement your Japanese Katsu bowls with delightful side dishes that enhance the meal’s overall appeal. Here are some great options:
- Miso Soup: A warm bowl of miso soup provides umami flavor that pairs beautifully with katsu.
- Edamame: Lightly salted edamame offers protein-rich snacking that’s easy to prepare.
- Japanese Potato Salad: Creamy potato salad made with mayonnaise, carrots, and cucumbers adds a rich contrast.
- Seaweed Salad: Refreshing seaweed salad brings a unique texture and flavor profile to your meal.
- Steamed Broccoli: Simple steamed broccoli adds color and nutrients without overpowering the main dish.
- Cucumber Pickles: Sweet and tangy cucumber pickles provide a refreshing crunch alongside the katsu.
With these serving suggestions, tips for perfection, and accompanying sides, you’ll have everything you need for an authentic Japanese Katsu experience at home!
Common Mistakes to Avoid
Avoid these common mistakes for a perfect Japanese Katsu Bowl experience.
- Skipping the rice rinsing: Not rinsing the rice can lead to a sticky texture. Always rinse until the water runs clear to achieve fluffy rice.
- Overcrowding the pan: Frying too many pieces of katsu at once can lower the oil temperature, resulting in soggy katsu. Cook in batches to maintain heat.
- Not resting the chicken: Cutting into katsu right after frying can cause juices to escape. Let it rest on paper towels for a few minutes before slicing.
- Ignoring seasoning: Failing to season the chicken before breading can lead to bland flavors. Season generously with salt and pepper for a tasty result.
- Using wrong oil: Choosing an oil with a low smoke point can affect frying. Use vegetable oil or another high smoke point oil for optimal results.
Storage & Reheating Instructions
Refrigerator Storage
- Store Japanese Katsu Bowls in an airtight container.
- Keep in the refrigerator for up to 3 days.
Freezing Japanese Katsu Bowls: A Delicious Guide to Making Authentic Katsu at Home
- Place cooled katsu and rice in separate airtight containers or freezer bags.
- Freeze for up to 2 months for best quality.
Reheating Japanese Katsu Bowls: A Delicious Guide to Making Authentic Katsu at Home
- Oven: Preheat oven to 350°F (175°C). Place katsu on a baking sheet and heat for about 15 minutes until crispy.
- Microwave: Heat katsu on a microwave-safe plate for 1-2 minutes. This may not keep it crispy.
- Stovetop: Reheat on medium heat in a skillet, adding a little oil if needed, for about 5 minutes on each side.
Frequently Asked Questions
What are Japanese Katsu Bowls?
Japanese Katsu Bowls are delicious meals featuring breaded and fried meat served over rice, often accompanied by shredded cabbage and flavorful sauces.
Can I use beef instead of chicken for my katsu?
Yes, you can use beef loin or any preferred meat option in your Japanese Katsu Bowl recipe!
How do I make my own tonkatsu sauce?
You can easily mix soy sauce, Worcestershire sauce, ketchup, and additional seasonings to create your own tonkatsu sauce.
How do I customize my Japanese Katsu Bowls?
Feel free to add vegetables like carrots or bell peppers, or try different sauces according to your taste preferences!
Final Thoughts
Japanese Katsu Bowls are not only delicious but also versatile. You can easily customize them with different meats or vegetables. Try making this recipe at home, and enjoy the comforting flavors of Japan in your kitchen!
Chicken Katsu Bowls
Enjoy the irresistible flavors of homemade Chicken Katsu Bowls, a delightful Japanese classic that’s easy to prepare and perfect for any occasion. This dish features crispy, golden-brown chicken served over fluffy seasoned rice, paired with a tangy sauce and garnished with fresh vegetables. Not only is it a hit among kids and adults alike, but it’s also customizable to fit your taste preferences. Whether you’re hosting a family dinner or craving comfort food, these Katsu Bowls will impress your guests and satisfy your hunger with their rich textures and flavors.
- Prep Time: 30 minutes
- Cook Time: 20 minutes
- Total Time: 50 minutes
- Yield: Approximately 4 servings 1x
- Category: Main
- Method: Frying
- Cuisine: Japanese
Ingredients
- 2 boneless chicken breasts (or beef loin)
- Salt and pepper
- 1 cup all-purpose flour
- 2 large eggs
- 1 cup panko breadcrumbs
- Vegetable oil, for frying
- 2 cups Japanese short-grain rice
- 2 ½ cups water
- 1 tablespoon rice vinegar
- 1 tablespoon sugar
- ½ teaspoon salt
- ¼ cup tonkatsu sauce
- 1 tablespoon soy sauce
- 1 teaspoon Worcestershire sauce
- 1 teaspoon ketchup
- Shredded cabbage, for garnish
- 2 green onions, sliced, for garnish
- Sesame seeds, for garnish
Instructions
- Rinse rice under cold water until clear. Soak in water for 30 minutes.
- Cook rice in a saucepan: bring to a boil, reduce heat, cover, and simmer for 15 minutes. Let sit covered for another 10 minutes.
- Mix rice vinegar, sugar, and salt in a bowl; fold into cooked rice.
- Pound chicken breasts to an even thickness; season with salt and pepper.
- Set up a breading station: one bowl for flour, one for beaten eggs, and one for panko breadcrumbs.
- Dredge chicken in flour, dip in egg, then coat with panko.
- Heat vegetable oil in a skillet over medium heat; fry chicken for about 4–5 minutes per side until golden brown.
- Drain on paper towels and slice into strips.
- Combine tonkatsu sauce ingredients in a bowl; mix well.
- Assemble bowls: serve seasoned rice topped with sliced katsu, shredded cabbage, green onions, drizzle with sauce, and sprinkle sesame seeds.
Nutrition
- Serving Size: 1 serving
- Calories: 550
- Sugar: 4g
- Sodium: 800mg
- Fat: 24g
- Saturated Fat: 4g
- Unsaturated Fat: 18g
- Trans Fat: 0g
- Carbohydrates: 60g
- Fiber: 3g
- Protein: 30g
- Cholesterol: 150mg