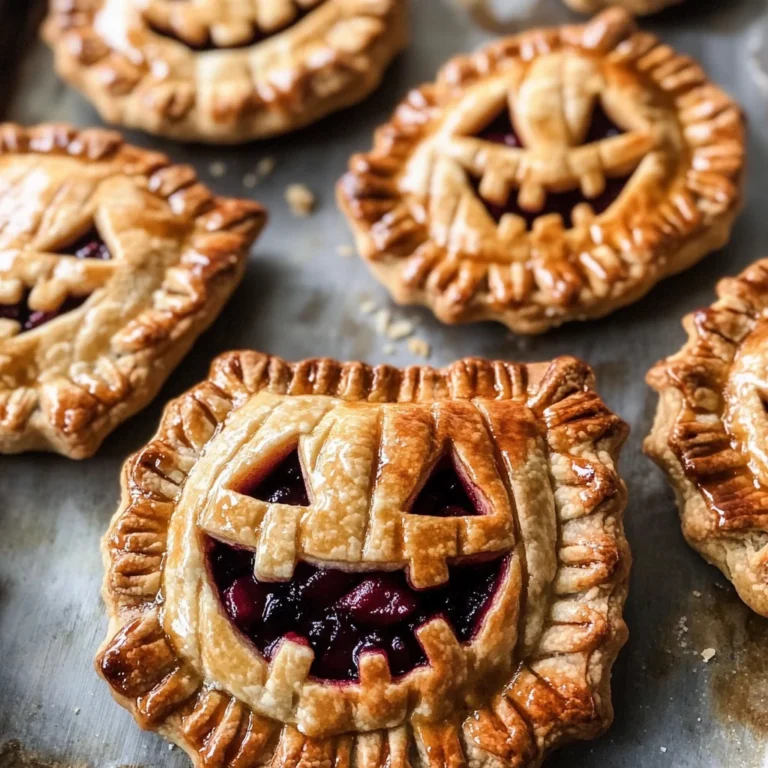
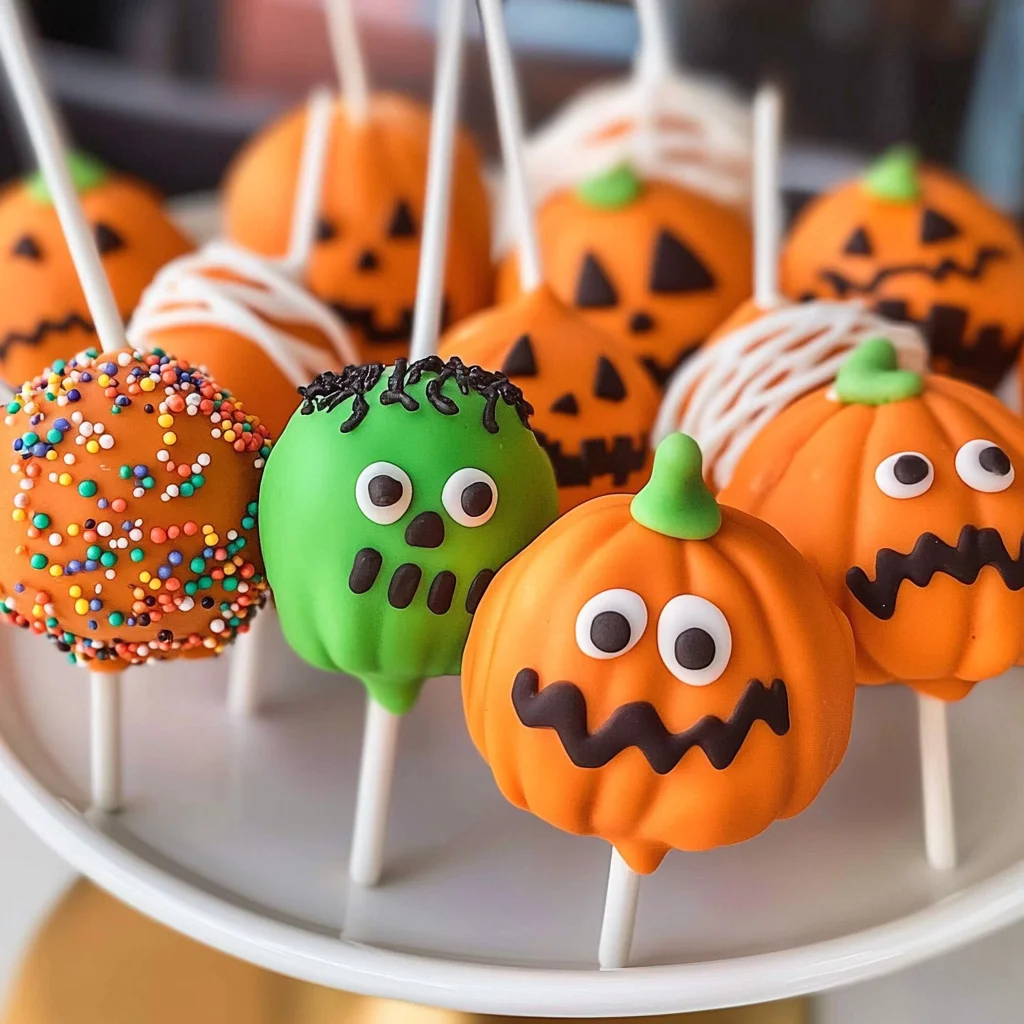
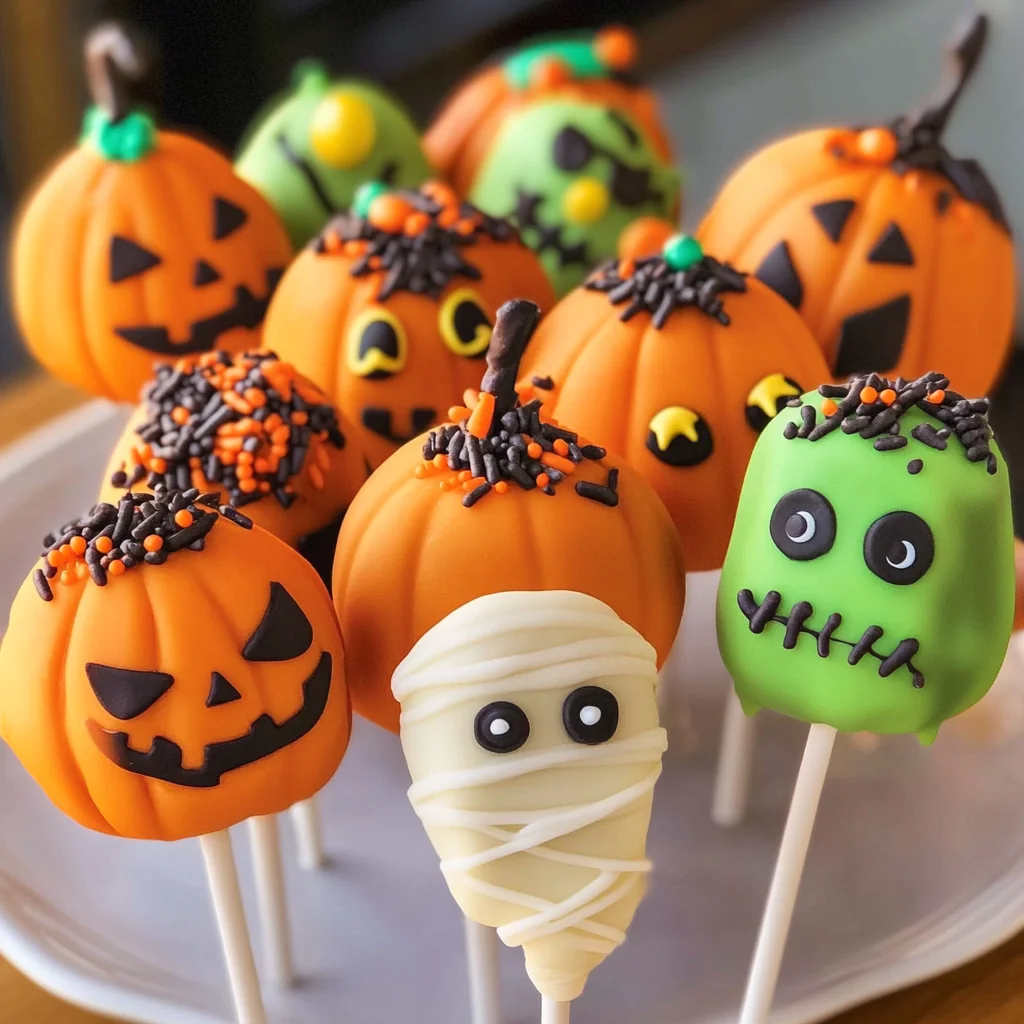
Halloween Cake Pops
Add these spooky cake pops to your next Halloween party. Made with vanilla or chocolate cake, these bite-sized treats are perfect for celebrating Halloween. Decorate them as a Pumpkin, Frankenstein, or Mummy to delight guests of all ages. Halloween Cake Pops are not only delicious but also fun to make and share.
Why You’ll Love This Recipe
- Easy to Make: With simple ingredients and straightforward steps, this recipe is accessible for all skill levels.
- Customizable Designs: Create unique decorations that match your Halloween theme, whether spooky or cute!
- Perfect Party Treats: These cake pops are great for gatherings, ensuring everyone gets a fun and tasty treat.
- Deliciously Versatile: Choose between vanilla or chocolate cake flavors and mix it up with various toppings.
- Kid-Friendly Fun: Involve the little ones in decorating, making it a fun family activity during Halloween preparations.
Tools and Preparation
To create these delightful Halloween Cake Pops, having the right tools makes the process smoother. Gather your kitchen essentials before you start baking!
Essential Tools and Equipment
- Baking pan (13 x 9)
- Mixing bowls
- Electric mixer
- Cake pop sticks
- Microwave-safe bowl
Importance of Each Tool
- Baking pan: Ensures even baking for your cake, resulting in a moist and delicious base for your pops.
- Electric mixer: Makes combining ingredients quick and easy, allowing for a smooth batter without lumps.
- Cake pop sticks: Provide a sturdy way to enjoy these delightful treats while adding to their presentation.
Ingredients
To whip up these festive Halloween Cake Pops, you will need the following ingredients:
For the Cake Base
- 1 box Favorite cake mix
- 1 3.4 oz box instant pudding mix
- 4 eggs
- 1 cup water
- 1/3 cup vegetable oil
For Assembly
- 1 cup Frosting
- Candy Melts
- Toppings – sprinkles, candy eyes
How to Make Halloween Cake Pops
Step 1: Preheat the Oven
Preheat your oven to 350°F. Spray your 13 x 9 pan with vegetable pan spray to ensure easy removal after baking.
Step 2: Prepare the Batter
In a large bowl, combine:
1. Cake mix
2. Pudding mix
3. Eggs
4. Water
5. Vegetable oil
Beat at medium speed for about 2 minutes until well combined. Pour this mixture into your lightly greased cake pan.
Step 3: Bake the Cake
Bake for 30-40 minutes or until a toothpick inserted in the center comes out clean. Allow the cake to cool in the pan for about 10 minutes.
Step 4: Crumble the Cake
In a large bowl, crumble the cooled cake using hands or two forks until no large chunks remain.
Step 5: Mix with Frosting
Add frosting to the crumbled cake and mix with fingers until fully combined.
Step 6: Form Cake Balls
Shape the mixture into small balls using your hands. Aim for uniformity in size for even decoration later on.
Step 7: Chill in Refrigerator
Place the formed cake balls in the refrigerator for at least 2 hours to harden properly.
Step 8: Melt Candy Melts
Melt Candy Melts in a microwave-safe bowl using 30-second intervals at half power until smooth.
Step 9: Insert Sticks into Cake Balls
Dip one end of each stick into melted Candy Melts and insert it into each cake ball; let them set. You can speed up this process by placing them in the freezer for about 20 minutes.
Step 10: Dip in Candy Melts
Wait until the candy coating is completely firm before dipping each pop into melted Candy Melts completely.
Step 11: Add Toppings
Sprinkle on your favorite decorations like chopped candy, nuts, sprinkles, or candy eyes to complete your festive look!
How to Serve Halloween Cake Pops
Halloween Cake Pops are not only delicious but also a fun addition to any Halloween gathering. These festive treats can be presented in various creative ways to enhance the spooky atmosphere of your party.
Individual Treat Bags
- Use clear treat bags to package single cake pops, tying them with orange or black ribbons for a cute and portable dessert option.
Cake Pop Stand
- Display your cake pops on a decorative stand or foam block, making it easy for guests to grab their favorite designs while adding an eye-catching centerpiece.
Themed Dessert Table
- Create a Halloween-themed dessert table featuring your cake pops alongside other spooky treats like ghost-shaped cookies and pumpkin cupcakes for a complete dessert experience.
Candy Buffet
- Include your cake pops in a candy buffet where guests can choose their favorites. This interactive setup allows everyone to customize their own Halloween treat plate.
How to Perfect Halloween Cake Pops
Creating the perfect Halloween Cake Pops requires attention to detail. Here are some tips to ensure your treats turn out wonderfully.
-
Choose Quality Ingredients: Use high-quality cake mix and frosting for the best flavor and texture. Fresh ingredients can elevate your cake pop game.
-
Crumble Carefully: When crumbling the cooled cake, ensure there are no large chunks left. A smooth mixture makes it easier to form uniform balls.
-
Chill Before Dipping: Allow the formed cake balls to chill in the refrigerator for at least two hours before dipping. This helps them maintain their shape during coating.
-
Melt Evenly: Melt Candy Melts slowly, stirring frequently, to avoid overheating. This ensures a smooth coating on your cake pops.
-
Add Fun Toppings: After dipping, sprinkle with colorful toppings immediately while the coating is still wet. This adds flavor and visual appeal.
-
Store Correctly: Store leftover cake pops in an airtight container in the fridge for freshness. They can last several days without losing quality.
Best Side Dishes for Halloween Cake Pops
Pairing side dishes with your Halloween Cake Pops can create a well-rounded festive menu. Here are some great options:
-
Spooky Veggie Platter: A colorful arrangement of vegetables shaped like ghosts and pumpkins, served with a creamy dip.
-
Monster Nachos: Tortilla chips topped with cheese, guacamole, and salsa arranged creatively to resemble monster faces.
-
Witch’s Brew Soup: A vibrant green soup made from blended spinach or peas, served hot; a perfect match for the season’s theme.
-
Cheesy Pumpkin Puffs: Bite-sized puff pastries filled with cheesy pumpkin filling; they make an excellent savory contrast to sweet treats.
-
Ghostly Guacamole Dip: Creamy guacamole served in a bowl decorated with tortilla chips arranged like ghost faces around the edges.
-
Candy Corn Fruit Cups: Layered fruit cups resembling candy corn colors using pineapple, mandarin oranges, and whipped cream; these add a refreshing touch!
-
Bat Wings: Chicken wings seasoned with spicy flavors and decorated with edible eyes; these savory bites will delight guests of all ages.
-
Pumpkin Spice Popcorn: Sweet popcorn drizzled with pumpkin spice syrup; this crunchy snack complements the softness of cake pops perfectly!
Common Mistakes to Avoid
When making Halloween Cake Pops, it’s important to avoid common pitfalls that can ruin your spooky treats.
- Skipping the chilling step – Not chilling the cake balls before dipping can lead to a messy result. Always chill for at least 2 hours to ensure they hold their shape.
- Using too much frosting – Overloading on frosting can make the mixture too wet and difficult to form into balls. Start with a small amount and gradually add more if needed.
- Not using enough Candy Melts – Insufficient melting chocolate can leave your cake pops unevenly coated. Make sure you have plenty of Candy Melts for a smooth dip.
- Forgetting to insert sticks correctly – Inserting sticks into uncooled cake balls can cause them to fall off. Dip the stick in melted Candy Melts before inserting it into the cake ball for better adhesion.
- Rushing the cooling process – Trying to decorate before the Candy Melts have fully set will create a gooey mess. Allow ample time for everything to cool completely.
Storage & Reheating Instructions
Refrigerator Storage
- Store Halloween Cake Pops in an airtight container.
- They will keep well for up to 5 days in the fridge.
Freezing Halloween Cake Pops
- Place them in a single layer on a baking sheet until frozen, then transfer to a freezer-safe container.
- They can be frozen for up to 1 month.
Reheating Halloween Cake Pops
- Oven – Preheat to 350°F and warm for about 10 minutes, covered with foil to prevent drying out.
- Microwave – Heat for about 10 seconds at a time until just warmed through; be careful not to melt the coating.
- Stovetop – This method is not recommended as it may ruin the cake pops’ texture.
Frequently Asked Questions
Here are some common questions about making Halloween Cake Pops.
Can I use any cake mix for Halloween Cake Pops?
Yes, you can use any flavor of cake mix! Vanilla and chocolate are popular choices, but feel free to get creative.
How do I decorate Halloween Cake Pops?
You can use various toppings like sprinkles, candy eyes, or even drizzle contrasting colors of Candy Melts for added fun.
How long do Halloween Cake Pops last?
When stored properly in an airtight container, they last up to 5 days in the refrigerator and up to 1 month in the freezer.
What if my Candy Melts are too thick?
If your Candy Melts are thick, you can thin them out by adding a small amount of vegetable oil or shortening while melting.
Can I make these Halloween Cake Pops ahead of time?
Absolutely! You can make them a day or two in advance and store them until you’re ready to serve.
Final Thoughts
Halloween Cake Pops are a delightful treat that adds fun and creativity to your celebrations. With endless possibilities for customization and decoration, they’re perfect for any Halloween party. Try this recipe and let your imagination run wild with colors and toppings!
Halloween Cake Pops

Create festive Halloween Cake Pops that are fun and easy! Perfect for parties, these spooky treats will delight both kids and adults.
- Prep Time: 20 minutes
- Cook Time: 40 minutes
- Total Time: 1 hour
- Yield: Approximately 20 servings 1x
- Category: Dessert
- Method: Baking
- Cuisine: American
Ingredients
- 1 box favorite cake mix
- 1 3.4 oz box instant pudding mix
- 4 eggs
- 1 cup water
- 1/3 cup vegetable oil
- 1 cup frosting
- Candy melts for coating
- Optional toppings: sprinkles, candy eyes
Instructions
- Preheat your oven to 350°F and prepare a 13 x 9 baking pan with vegetable spray.
- In a large bowl, mix together the cake mix, pudding mix, eggs, water, and vegetable oil at medium speed until smooth.
- Pour the batter into the prepared pan and bake for 30-40 minutes until a toothpick comes out clean. Cool for about 10 minutes.
- Crumble the cooled cake into a large bowl and combine it with frosting until fully mixed.
- Shape into uniform balls and chill in the refrigerator for at least 2 hours.
- Melt candy melts in a microwave-safe bowl until smooth.
- Dip one end of each stick into melted candy before inserting it into each ball; let set.
- Dip each ball completely in melted candy melts and add desired toppings while still wet.
Nutrition
- Serving Size: 1 serving
- Calories: 150
- Sugar: 12g
- Sodium: 75mg
- Fat: 6g
- Saturated Fat: 2g
- Unsaturated Fat: 3g
- Trans Fat: 0g
- Carbohydrates: 22g
- Fiber: <1g
- Protein: 2g
- Cholesterol: 30mg